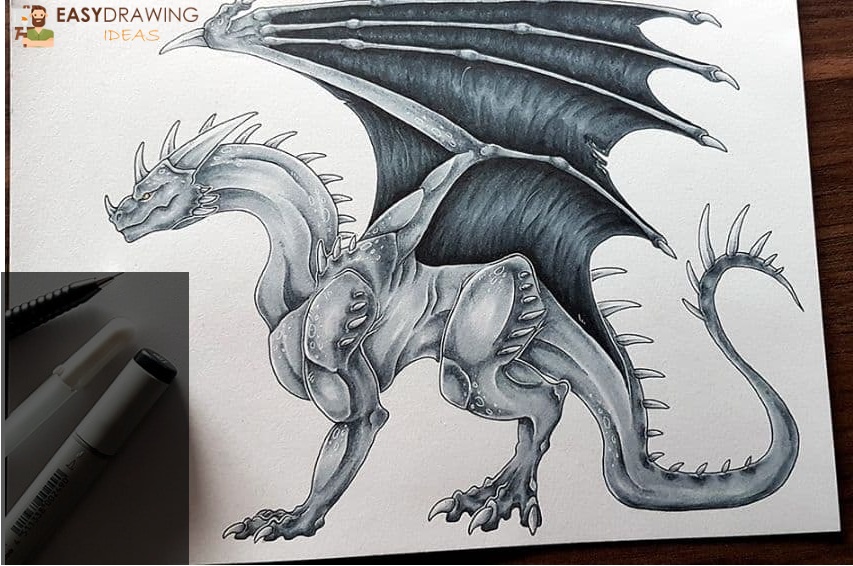
Drawing an awe-inspiring dragon may seem daunting, but breaking it down into simple steps makes the process approachable for beginners. With some basic shapes and a little patience, anyone can learn to draw fun dragon art.
Step 1: Sketch the Basic Head Shape
Lightly sketch a circle near the top of your paper to represent the basic shape of the dragon’s head. Then add two lines angling down from the circle to form the snout.
Step 2: Build upon the Head & Draw the Face Guidelines
Using the initial head shape as a guide, map out the symmetrical facial features with various lines and shapes. Add curved lines for jaws, horns, brow ridges eyes, and nostrils.
Step 3: Refine the Head Structure & Start the Neck
Erase unwanted sketch lines and darken key lines defining the facial structure. Adjust shapes as needed to achieve the desired look. Extend a long sloped line down from the lower jaw to establish the neck area.
Step 4: Shape the Body, Wings, & Tail
Using basic shapes, sketch the body structure. Attach wings by adding curved lines. Then draw a long, slightly curved line for the tail. Refine body contours as desired.
Step 5: Add Details to Wings, Limbs, Spines & Claws
Flesh out details like wing membranes, ridges, limbs, claws and spiked tips for appending the wings, tail and head. Adjust proportions and anatomical details.
Step 6: Finish with Scales, Patterns and Facial Features
Add finishing touches like scales, horns, fangs, facial markings and shading. Erase any remaining guidelines. Customize your dragon with unique colors, patterns and accessories. Your